


FREESKY Blogs
Stay updated with the latest news, tips, and insights on e-bikes, technology, and sustainable riding through the FREESKY blog.


You May Also Like

Cycling Package (10-Piece Kit)
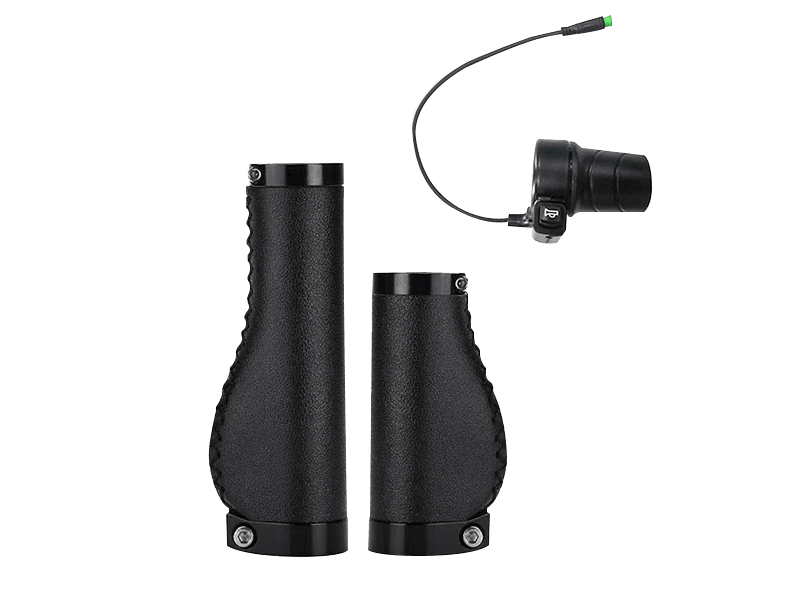
Twist Throttle with Grips
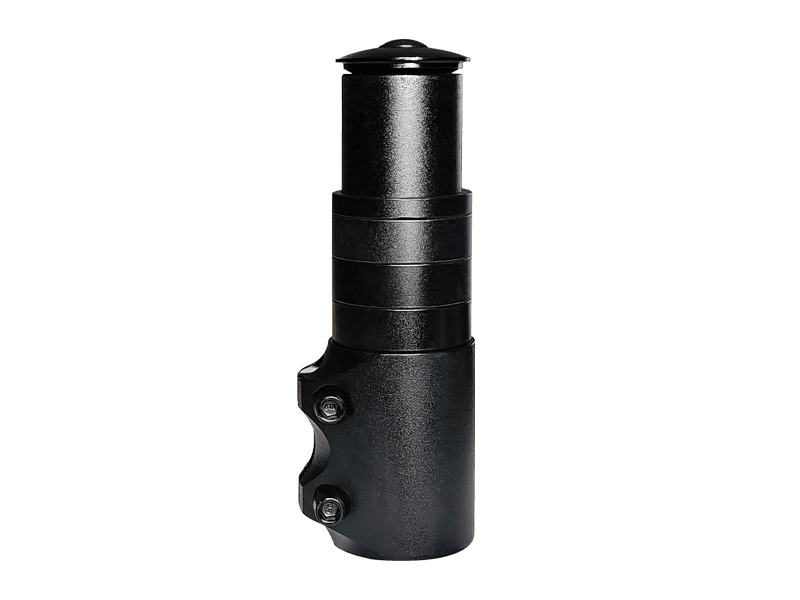
Stem Extender
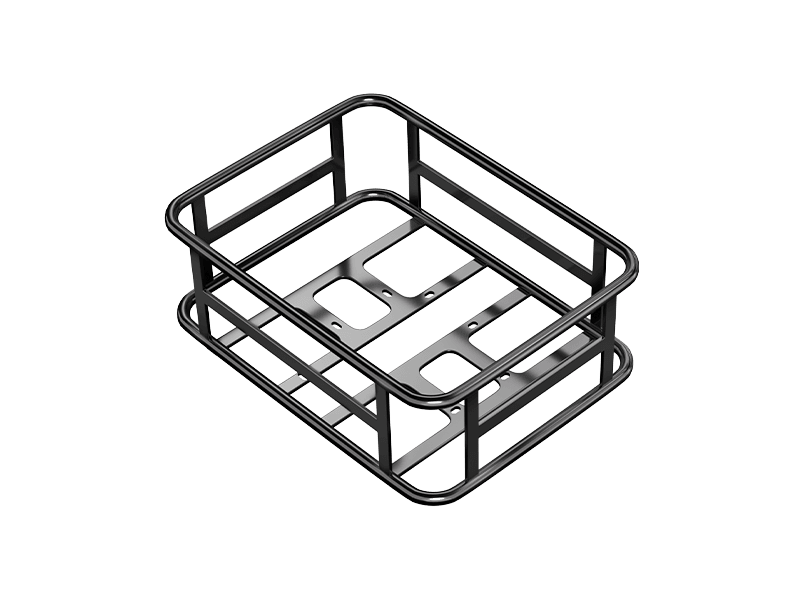
Rear Basket


There's no item in your cart.
You May Also Like
Cycling Package (10-Piece Kit)
£299.00
Twist Throttle with Grips
£59.00
Stem Extender
£35.00
Rear Basket
£89.00
You're Saving £0.00
Shipping, taxes, and discount codes calculated at checkout.All Topics


Do I Need a Full Suspension Electric Mountain Bike?
Jul 11, 2025 09:00
When choosing your first electric mountain bike (e-MTB), one of the most common questions UK riders ask is: should I go for a hardtail or a full suspension model? The answer depends on where you ride, your comfort expectations, and how much maintenance you’re prepared to do. In this guide, we’ll explore the differences between hardtail and full suspension e-MTBs from the perspective of British trails, weather, and rider habits — helping you choose the model that truly fits your needs. Why This Comparison Matters UK riding conditions are unique: rooty forest trails in the Peak District, wet bridleways in the Lake District, rocky climbs in Snowdonia, or pothole-ridden urban roads in older towns. The choice between a hardtail and full suspension electric mountain bike (eMTB) can significantly affect how much you enjoy these terrains. - Hardtail e-MTBs: Suspension only at the front fork; better for smoother trails, towpaths, and commuting. - Full Suspension e-MTBs: Front and rear suspension for absorbing bumps from both wheels; perfect for challenging off-road terrain. Understanding these differences helps you invest in a bike that meets your expectations — without overpaying for features you might not need. Key Differences: Hardtail vs. Full Suspension e-MTB 1. Suspension System - Hardtail e-bikes: Front suspension fork only. Ideal for canal paths, fire roads, and mild woodland trails. - Full suspension e-bikes: Suspension at both ends, giving better control and comfort on rough, uneven, or downhill terrain. 2. Price - Hardtail e-MTBs: Typically range from £1,200 to £2,500. Excellent value for new riders or commuters. - Full suspension e-MTBs: Start from around £2,800 and can go beyond £6,000. Worth the cost for advanced trails and downhill riding. 3. Maintenance - Hardtails: Easier to maintain with fewer moving parts. - Full suspension: Require regular maintenance on pivots and rear shocks. Best serviced by a professional every few months if used intensively. 4. Ride Comfort - Hardtail: Less comfortable on bumpy trails. Better suited for smooth gravel or tarmac. - Full suspension: Absorbs shocks from both ends, giving a plush ride even on rock gardens or rooty singletrack. 5. Handling and Control - Hardtail: Sharper on climbs, great for learning basic handling skills. - Full suspension: Better traction and stability on loose, steep, or unpredictable terrain. Great for confident descents. Usage Scenarios Hardtail e-MTBs are ideal for: - City commutes and hybrid use (e.g. road + park paths) - Riders on a tighter budget - Cross-country trails (Sherwood Pines, Cannock Chase) - Beginners who want a lighter and simpler setup Full Suspension e-MTBs are ideal for: - Technical trails (e.g. Coed y Brenin, Glentress, BikePark Wales) - Riders prioritising comfort and traction - Steep and rocky terrain where control is crucial - Heavier riders who need better shock absorption Battery and Efficiency Hardtails are more efficient on battery usage, making them perfect for longer rides on moderate terrain. Full suspension bikes, due to the added weight and drag from the suspension movement, consume slightly more power — especially when tackling steep climbs or loose trails. Pros and Cons Summary Feature Hardtail e-MTB Full Suspension e-MTB Suspension Front only Front + Rear Ride Comfort Moderate on smooth trails Excellent across all terrains Cost Lower (£1,200–£2,500) Higher (£2,800–£6,000+) Maintenance Lower, DIY-friendly Higher, may need pro servicing Weight Lighter Heavier (more control downhill) Range Efficiency Higher Slightly lower due to added weight Ideal Use City, XC, bridleways Mountains, enduro trails, technical terrain FAQs Q1: Is a hardtail enough for UK trails?Yes — for most forestry commission trails and local routes, a hardtail will serve you well. However, for bike parks and mountainous descents, you’ll want a full-sus. Q2: Is a full-suspension e-MTB worth the price?If you frequently ride technical terrain or value comfort, absolutely. It makes descents safer and climbing more efficient when traction is poor. Q3: Do full suspension e-MTBs require more servicing?Yes, mainly due to moving linkage points and rear shocks. But for serious trail riders, the performance benefits outweigh the extra care needed. Q4: Can I use a full suspension e-bike for commuting?Definitely. In fact, UK city roads full of potholes and uneven pavement are a good reason to consider a full-sus — just expect a bit more weight and less range. Choosing between a hardtail and a full suspension e-MTB comes down to your budget, riding terrain, and expectations around comfort and performance. - For everyday riding and lighter trails: A hardtail e-MTB is the best bang for your buck. - For technical descents, trail parks, and rough terrain: A full suspension e-MTB is worth the investment. At Freesky UK, we offer both hardtail and full-suspension models designed to perform on real British trails. Whether you’re commuting, cruising country lanes, or tackling Snowdonia's toughest climbs, we’ve got you covered. 👉 FREESKY Full-Suspension E-MTBs. 👉 FREESKY Hardtail e-MTBs.
Read More

14 Essential Tips for Buying an Electric Mountain Bike
Jul 04, 2025 09:00
Buying your first electric mountain bike (e-MTB) can feel like a daunting task. With a vast array of brands, models, and prices on offer, it’s easy to feel overwhelmed. How much should you realistically spend to get a reliable e-MTB capable of handling diverse trails? Should you opt for a carbon or alloy frame? Is longer suspension travel really better? And what exactly are “mullet” wheels? Then there’s the motor and battery system to consider. Bosch, Shimano, TQ, Fazua, Yamaha — which is best suited to your needs? Do you want maximum power for tackling steep climbs, or a quieter, more subtle motor for easy countryside rides? How big should the battery be? Running out of charge mid-ride is every rider’s nightmare, so getting the right balance of assistance and battery capacity is key. Over the years, we’ve tested a wide range of e-MTBs, learning what works well on varied terrain and what doesn’t. To help you make an informed choice, here are the 14 most important factors to consider when buying your first electric mountain bike. 1. Set Your Budget Realistically In the UK market, entry-level hardtails and basic full suspension e-MTBs start from around £3,500 to £4,000. These bikes are ideal for casual rides on towpaths, forest trails, and bridleways. However, if you’re planning to ride more technical singletrack in places like the Lake District or Scottish Highlands, it’s worth considering bikes in the £6,000 to £9,000 range. Buying online often saves money but requires some mechanical skills for assembly. Alternatively, local bike shops provide expert setup and test rides, which can be invaluable. 2.Choose Suspension Based on Riding Style Suspension travel greatly affects ride comfort and handling. We recommend full suspension e-MTBs for UK trails, as rear suspension cushions impacts better than hardtails, especially with the added motor and battery weight. Common suspension categories: - XC/Trail: Up to 140mm travel, suited for smoother paths and moderate terrain - All Mountain: 140-160mm, versatile for most UK trails - Enduro: 160-180mm, for aggressive downhill and technical descents - Downhill (DH): 180mm+, dedicated race or bike park use For most riders tackling UK’s mixed terrain, a travel range of 150-160mm is ideal — combining control, comfort, and agility. 3. Full-Powered or Lightweight e-MTB? Full-powered e-MTBs come with motors delivering 75-108Nm torque and batteries up to 900Wh. They provide strong assistance for climbing steep hills and are heavier (21-26kg). Great if you carry extra weight or want to cover more ground with less effort. Lightweight e-MTBs offer subtler support (35-60Nm torque) and smaller batteries (320-430Wh), making them 4-6kg lighter and more nimble. They require fitter riders who want a more natural pedalling feel but have less range at high assistance. Heavier riders (over 90kg) should opt for full-powered models with bigger batteries for reliable performance on UK’s varied terrain. 4.Motor Matters — But It’s More Than Just Power The motor is one of the most important components of any electric mountain bike. While it’s tempting to focus solely on power figures, such as torque and peak wattage, there’s far more to motor performance than just raw output. Most quality e-MTBs come with mid-drive motors from reputable brands like Bosch, Shimano, Yamaha, Brose (used by Specialized), or TQ. These motors typically offer between 60Nm to 90Nm of torque, which is more than enough for steep climbs, technical terrain, and longer trail rides. For example, the Bosch Performance Line CX delivers a smooth and powerful riding experience with up to 85Nm of torque, and Shimano’s EP801 is similarly robust while offering refined control on varied terrain. A notable addition to this segment is Bafang, a motor manufacturer that has gained popularity among both OEM brands and custom builders. The Bafang M620 (also known as the Ultra motor) is a full-powered mid-drive unit offering up to 160Nm of torque, making it one of the most powerful e-MTB motors available. This makes it a strong choice for heavier riders, steep hill climbing, or hauling cargo. However, the higher torque comes with additional weight and a more aggressive power delivery, which may not suit all riding styles. For UK riders, Bafang motors are an increasingly common sight, especially among direct-to-consumer brands offering strong value for money. They're also well supported by a growing network of UK-based service partners and spare parts distributors — an important consideration for long-term ownership. Beyond power, factors like pedal assist sensitivity, software tuning, and riding feel play a significant role in the overall trail experience. Brands like Bosch and Shimano invest heavily in motor firmware development, offering adaptive modes that respond intuitively to your pedalling force. This results in more natural assistance and better control on technical sections. Battery compatibility is also tied directly to the motor. For example, Shimano motors require specific Shimano battery units, and Bafang motors are typically paired with high-capacity 720Wh or 840Wh batteries, often with options for removable or semi-integrated designs. 5.Battery Size — Bigger Isn’t Always Better Battery capacity is measured in watt-hours (Wh). More Wh means longer range but also adds weight and bulk. Examples for UK models: - Lightweight: 320-430Wh (e.g., Specialized Levo SL) - Mid-range: 630Wh (e.g., Merida eOne-Sixty) - High capacity: up to 900Wh (e.g., Canyon Spectral:ON) Bigger batteries add weight high on the frame, possibly affecting handling. Smaller batteries make the bike more agile but may limit range, especially at high assist settings. 6.Consider Range Based on UK Terrain Range depends on assist level, rider weight, trail technicality, and elevation gain. UK trails often feature steep climbs and unpredictable terrain, so expect to use mid to high assistance settings, which consume more battery. Aim to ride with a steady cadence and avoid sudden acceleration to maximise range. Heavier tyres and aggressive tread will increase drag and reduce range but offer better grip on slippery British trails. 7.Weight — Important But Not Everything E-MTBs weigh roughly 6-8kg more than regular mountain bikes due to motor and battery. Weight affects transport, carrying the bike, and manoeuvrability. Heavier bikes offer better stability at speed, which can boost rider confidence on technical descents. Lightweight e-MTBs excel in agility and climbing but may sacrifice some downhill stability. 8.Get the Right Frame Size and Geometry Correct sizing is essential. UK riders should consult size charts on brand websites and consider their riding style. Longer travel bikes for descending generally have slacker head angles (63-65°) and longer wheelbases, offering stability on fast trails. Shorter travel bikes for all-round riding feature steeper head angles (66-68°) and tighter geometry for nimble handling. 9.Wheel Size — Full 29er or Mullet? Full 29-inch wheels provide smooth rollover and traction, especially on rough UK trails and longer rides. Mullet setups (29-inch front, 27.5-inch rear) offer more agile handling and better clearance on steep descents, popular for technical singletrack. Many UK riders prefer mullet for the fun and responsiveness it delivers on twisty trails. 10.Alloy or Carbon Frame Carbon frames are lighter and stiffer but come at a premium price. Alloy frames are tougher, cheaper, and often preferred for rougher British trail riding where scratches and knocks are common. Lightweight e-MTBs are mostly carbon due to weight priorities. 11.Components — Don’t Overlook Tyres, Brakes, and Drivetrain Tyres with thicker casings and aggressive tread are essential for UK conditions, protecting against punctures on rocky or rooty paths. High-quality brakes with large rotors (180mm or 203mm) ensure reliable stopping power on long descents. Drivetrains like Shimano Linkglide or SRAM Transmission offer durability and smooth shifting under motor torque. 12.Buying Online vs. Local Shop Online shopping often means better prices but requires assembly skills. Local UK bike shops provide expert setup, test rides, and after-sales support, which many riders find invaluable. Some online brands provide detailed setup guides and support; consider your mechanical confidence before deciding. 13.Adjustability and Upgrade Potential Look for frames that allow suspension travel upgrades, geometry adjustments (flip chips), and aftermarket component compatibility. This flexibility helps extend your e-MTB’s lifespan and adapts it as your riding skills progress. 14.Research Reviews and Owner Feedback Consult UK-specific e-MTB reviews and forums to understand real-world performance. Look for issues like reliability, servicing costs, and component wear relevant to UK trails and weather. Choosing the right electric mountain bike in the UK is a balance of budget, terrain, riding style, and personal preference. Whether you prioritise lightweight agility or full-powered muscle, understanding these 14 tips will guide you towards the perfect ride. At Freesky UK, we’re committed to providing premium e-MTBs designed to conquer British trails with confidence and style. Explore our range and experience the freedom of electric mountain biking today. Discover FREESKY E-MTBs
Read More

Hardtail vs Full‑Suspension e‑MTBs: A Comprehensive Guide for Riders
Jun 27, 2025 06:45
Hardtail and full‑suspension electric mountain bikes both offer comfort compared to rigid models, but choosing the right type can significantly improve your ride. In this guide, we'll compare designs, performance, maintenance, and usage, helping you choose your next e‑MTB with confidence. Why This Comparison Matters Selecting between a hardtail e‑bike (which has suspension only in the front fork) and a full‑suspension e‑MTB (equipped with both front and rear suspension) affects how the bike handles typical British terrain, your comfort, and upkeep. Whether commuting to work or hitting rugged trails in the Peak District, the right bike makes all the difference. 1. Suspension System Hardtail e‑MTB: Front suspension only. Suitable for smoother bike paths, canal trails, and well-maintained bridleways. Full‑suspension e‑MTB: Comes with both front fork and rear shock. Ideal for rougher environments—forest roots, chalky descents, and wet winter trails. 👉 In summary: hardtails are lighter and efficient; full-suspension bikes provide superior comfort and control on rough ground. 2. Cost and Value Hardtails: Generally more affordable (£1,000–£2,500), offering excellent value for everyday riders. Full‑suspension: Typically priced from £1,500 to over £6,000, reflecting advanced suspension and frame complexity. Choose based on your terrain and how much comfort, control, and durability you're willing to invest in. 3. Maintenance Hardtail e‑bikes: Simpler design, fewer moving parts—easier to maintain and repair. Ideal for low-maintenance riders. Full‑suspension: Requires more regular servicing of shock, pivot bearings, and seals. When maintained well, they’re durable—just be prepared for upkeep. 🔧 Tip: A professional service once or twice a year helps extend lifespan. 4. Handling and Control Hardtails: Stable and manoeuvrable on smooth paths and urban environments. Full‑suspension: Offers better traction and control on technical trails and uneven surfaces. Perfect for confident descending and tackling roots and rocks. 5. Speed and Efficiency Hardtails: Lighter and more efficient on flat roads and gentle climbs. Better energy use and longer battery range. Full‑suspension: Heavier but more stable on tricky terrain. Battery drains faster, but they maintain speed and confidence on off-road rides. 6. Comfort and Ride Quality Hardtails: Adequate for smooth surfaces, but you’ll feel more vibration on rough terrain. Full‑suspension: Dual absorbers make long rides much more comfortable, reducing rider fatigue and easing strain on joints. Usage Scenarios Hardtail e‑Bikes Perfect for: Urban commuting Bike path outings Light cross-country routes Budget-conscious riders Full‑Suspension e‑Bikes Ideal for: Mountain biking Technical trails Long epic rides Riders who want comfort and control on rough terrain Pros and Cons Summary Aspect Hardtail e‑MTB Full‑Suspension e‑MTB Price ✔️ More affordable ❌ More expensive Weight/Power ✔️ Lighter & efficient on flats ❌ Heavier, more battery use Comfort ✔️ Decent on smooth trails ✔️ Excellent on rough terrain Control ✔️ Agile and responsive ✔️ Superior traction and stability Maintenance ✔️ Simpler, reliable ❌ Requires routine servicing Trail Capability ✔️ Light trails only ✔️ All-terrain & technical trails Buying Guide: What to Consider Budget: Hardtails approx. £1,000–£2,500 | Full‑suspension from £1,500+ Terrain: Smooth journeys = hardtail | Rough or varied = full-suspension Maintenance: Simple upkeep vs more components Experience level: Hardtails suit beginners | Full‑suspension best for experienced riders Test Ride Tips When trying bikes: Assess comfort and fit Test suspension performance Notice gear and brake feel Ride varied terrain: flat, hills, twisty paths Check battery life during longer rides Final Verdict Hardtail e‑MTBs are ideal for practical, cost-effective transportation and light trail rides. Full‑suspension e‑MTBs are better suited for adventurous riders seeking superior comfort, control, and performance across rugged terrain. Why Choose Freesky? Our range includes models to suit all riding needs: Warrior Pro: A nimble full-suspension e‑MTB with 140 mm travel and Samsung-powered 48V 30Ah battery—perfect for technical British trails. Alaska Pro: A long-travel, full-suspension powerhouse with 48V 41Ah battery—designed for endurance rides across diverse terrain.
Read More

How to Extend the Life of Your eBike Battery: Expert Tips from Freesky
Jun 06, 2025 09:00
The battery for your electric bike typically accounts for about a third of the total value of the bike, making it one of the most critical components to invest in and care for properly. At Freesky, we prioritise battery quality and longevity because a reliable eBike battery means more freedom on the road—and fewer costly replacements. Why Choosing the Best eBike Battery Matters in the UK When purchasing an electric bike in the UK, selecting a high-quality battery is essential. We recommend opting for eBikes with premium battery cells from the "big three" manufacturers: Samsung, Panasonic, or LG. These brands lead the market for reliability, safety, and lifespan. Freesky’s Warrior Pro model comes with a robust Samsung 48V 30Ah battery, designed to deliver consistent and dependable power for UK trails and urban rides. For riders seeking longer distances, the Alaska Pro features a larger 48V 41Ah battery, ideal for extended journeys. All Freesky batteries are UL2271-certified, meeting rigorous international safety standards to ensure peace of mind and the highest protection for your electric bike investment. Avoid cheap electric bike batteries commonly found in discount stores, which often lack quality assurance and comprehensive warranties. At Freesky, we stand by our batteries because your ride deserves the best. Understanding Lithium Ion Battery Technology for eBikes Most modern electric bikes use lithium-ion or lithium-polymer batteries. Although lithium battery technology dates back over a century, it has only become affordable and widely available in consumer eBikes over the past 15 years. The difference between lithium-ion and lithium-polymer batteries lies mainly in the electrolyte type, with lithium-polymer offering a slight increase in energy density at a higher cost. However, the biggest factor affecting your battery’s lifespan is how well you maintain it. Top Tips for eBike Battery Maintenance and Longevity in the UK Climate A well-maintained lithium-ion battery should last between 3 to 5 years. Here are three practical tips tailored for UK riders to get the most from your Freesky eBike battery: 1. Store Your Battery at Optimal Temperatures Temperature plays a crucial role in battery health. Avoid leaving your battery in direct sunlight or hot environments like a car boot on a sunny day, as excessive heat shortens battery life. The worst scenario is keeping a fully charged battery at high temperatures. When not in use, store your battery indoors in a cool, dry place ideally below 20°C (68°F). In cold UK winters, it’s vital to avoid charging your battery below freezing point, as this can damage the cells. Ride in cold weather is fine, but bring the battery indoors afterwards. Reduced power and range in cold conditions are normal and expected. 2. Store the Battery Partially Charged—Not Fully Charged or Empty Proper charge levels during storage affect battery lifespan. Aim to keep your battery charge between 40% and 80% for longer-term storage. Some chargers have a ‘storage mode’ to maintain this ideal voltage—use it if available. Avoid leaving your battery on the charger for extended periods at 100%. During off-season or prolonged storage, check and top up the battery charge every few months to prevent deep discharge. 3. Avoid Regularly Fully Discharging Your Battery Contrary to outdated advice, fully draining your lithium-ion battery regularly is harmful. Lithium-ion batteries do not have the ‘memory effect’ of older battery chemistries and benefit from partial discharge with frequent top-ups. Occasional full discharge, such as during long rides, is acceptable. For regular short rides, it’s better to charge every few rides than every time to avoid keeping the battery near full charge too long. Why Freesky’s eBike Batteries Are Your Best Choice in the UK Freesky is dedicated to providing high-performance, safe, and long-lasting batteries tailored to the needs of UK riders. All our batteries are UL 2271-certified to meet the highest safety standards. The Warrior Pro features premium Samsung cells for superior reliability, while the Alaska Pro offers a high-capacity 48V 41Ah battery engineered for extended range and heavy-load riding. By following these expert battery care tips, you can enjoy a reliable electric bike battery lifespan of 3 to 5 years, maximising your riding pleasure while avoiding costly replacements. Ready to upgrade your ride? Discover the Warrior Pro and Alaska Pro models with Freesky’s industry-leading battery technology.
Read More

How to Adjust Handlebar Height on Your Electric Mountain Bike for a More Comfortable Ride
May 22, 2025 07:00
Many electric mountain bike (EMTB) riders in the UK find that even a small adjustment to handlebar height can dramatically improve comfort, visibility, and control—especially on longer rides. Whether you’re tackling trails or commuting, getting your riding posture right can reduce fatigue, alleviate pressure on your back and wrists, and enhance confidence on rough terrain. For FREESKY riders in particular, all models—including Warrior Pro, Alaska Pro, and Ranger—are equipped with high-performance hydraulic disc brakes and all-terrain geometry. However, even with advanced components, discomfort caused by low handlebars or an overly aggressive riding position remains a common issue. That’s where handlebar height adjustments come in. Why Raise Your Handlebars? Many riders search phrases like "how to raise handlebars on electric bike" or "e-bike handlebar height adjustment UK" because of a few key discomforts: Neck or shoulder pain caused by a forward-leaning posture. Wrist or hand numbness due to overloading the front of the cockpit. Lower back strain, particularly on long climbs or extended rides. Poor visibility, especially when looking up from a deep forward lean. Raising the handlebars promotes a more upright, ergonomic riding stance that addresses these issues directly. This is particularly beneficial on fat tyre e-MTBs like those offered by FREESKY, which are built for off-road versatility and stability. Common Ways to Adjust Handlebar Height on EMTBs There are four primary methods to raise handlebars on electric mountain bikes: 1. Adjusting Headset Spacers Many modern bikes allow for fine height adjustment by rearranging the spacers on the steerer tube. You can lower the stem by placing spacers above it, or raise it by moving them below. Pros: No additional components required Simple and reversible adjustment Cons: Limited range of adjustment Only effective if you have unused steerer tube length 2. Flipping or Replacing the Stem Another common method involves flipping the stem (if it's angled) or replacing it with one that has more rise. Pros: Cost-effective if using existing components Can provide noticeable height increase Cons: Changes reach as well as height May require re-alignment of brakes and levers 3. Switching to Riser Handlebars Riser handlebars have built-in elevation and can lift the grips by 20–50 mm depending on design. Pros: Improves control on rough terrain Also allows wider grip stance Cons: Requires new handlebar purchase Rise is fixed—no fine-tuning 4. Installing a Stem Extender A stem extender (also known as a handlebar riser) is a straightforward solution for riders needing more height than what spacers or stem angles allow. It’s an especially popular option among FREESKY riders who prefer upright posture for trail visibility and comfort. The FREESKY Stem Extender is compatible with all FREESKY e-MTBs. It fits directly onto the steerer tube and allows riders to increase bar height by several adjustable increments—without replacing the stem or bars. Pros: Provides the widest adjustment range (up to approx. 70 mm) Easy to install and adjust Maintains original cockpit components Cons: Adds some weight and height to the front end Requires ensuring brake and gear cables have enough slack 👉 [Shop FREESKY Stem Extender Now] Key Considerations Before Adjusting Handlebar Height Cable Slack: Ensure there is enough length in your brake and gear cables to accommodate increased height. Ride Position: Raising bars too high may reduce front-end traction on climbs—especially on steep trails. Handling: Higher bars offer comfort but may slightly alter handling feel. Always test adjustments before heading onto technical terrain. Torque Settings: Use appropriate tools and avoid overtightening bolts during any adjustments. Summary: Comfort, Control, and Customisation Whether you’re looking for better posture, increased visibility, or reduced fatigue, adjusting handlebar height is one of the most effective ways to personalise your FREESKY e-MTB setup. For those wanting a simple, adjustable, and compatible solution, the FREESKY Stem Extender is a reliable upgrade. By fine-tuning your handlebar height, you’ll ride further, feel better, and get more enjoyment out of every adventure—on or off the trail.
Read More

How to Tighten Bike Brakes?
May 16, 2025 09:00
A UK Guide to Hydraulic Disc Brake Adjustment for E-MTB Riders Proper brake performance is essential for both safety and riding enjoyment—especially when you’re navigating the trails on a powerful electric mountain bike (e-MTB). If you’ve noticed your brake lever pulling in further than usual, or your stopping power isn’t as crisp as it should be, it’s time for a brake adjustment. In this UK-focused guide, we’ll walk through how to check and tighten hydraulic disc brakes, with a focus on FREESKY’s electric mountain bikes such as the Warrior Pro, Alaska Pro, and Ranger—all equipped with four-piston hydraulic disc brake systems. Why Brake Adjustment Matters on E-MTBs Electric mountain bikes place unique demands on your braking system. The added weight from the motor and battery, combined with higher speeds and steeper terrains, means your brakes need to perform consistently under pressure. FREESKY e-MTBs use advanced four-piston hydraulic disc brakes, which offer enhanced braking force and modulation. These systems are robust, but like any component, they require regular maintenance and occasional adjustment to stay in top condition. Signs Your Brakes May Need Adjustment You may need to tighten your hydraulic brakes if: The brake lever feels soft or spongy The lever pulls in too close to the handlebar before engaging The bike takes longer to stop than usual You hear light rubbing or squealing noises when not braking How to Tighten Hydraulic Disc Brakes on Your E-Bike Here’s a general process that applies to most hydraulic systems found on e-MTBs in the UK. If you're riding a FREESKY e-bike, your system is likely compatible with this approach: 1. Inspect the Brake Lever and Caliper Check the lever travel. If it pulls too far, it may indicate air in the system or worn brake pads. 2. Check for Pad Wear Remove the wheel (if necessary) and inspect the brake pads. If they are too thin, they may need to be replaced rather than tightened. 3. Align the Caliper Sometimes, brake rubbing or poor engagement is due to a misaligned caliper. Loosen the mounting bolts, apply the brake lever, and retighten the bolts while holding the lever. This centres the caliper over the rotor. 4. Brake Lever Adjustment Many levers feature a reach adjustment screw to fine-tune the distance between the lever and handlebar. This allows for a more responsive braking feel without affecting brake pressure. ⚠️ Note: If you suspect there is air in the brake lines or feel a significant loss in braking power, it may be necessary to bleed the system. This process is best carried out by a trained technician or reputable local bike mechanic. FREESKY Riders: What Makes Our Brakes Exceptional? At FREESKY, we understand that superior control starts with superior braking. That’s why models like the Warrior Pro, Alaska Pro, and Ranger are equipped with four-piston hydraulic disc brakes, engineered for power, precision, and reliability on technical terrain. Paired with 26" x 4" fat tyres, these braking systems ensure you benefit from: Improved stopping power, even on loose gravel or wet descents Greater modulation, giving you fine control over speed Better stability, thanks to the wider tyre contact patch that enhances traction Compared to traditional narrow-tyre MTBs with mechanical brakes, FREESKY’s setup offers a significant upgrade in safety and ride quality—ideal for the demanding e-MTB enthusiast. Final Thoughts Brake performance isn’t just about comfort—it’s a critical safety factor. Regular inspection and timely brake adjustments will keep your FREESKY electric mountain bike operating at its best, whether you’re commuting across town or charging down a trail. Not sure how to proceed or need personalised guidance? Reach out to our customer service team—we’re here to help you keep your ride running at its best.
Read More

How to Measure an E-MTB Frame Size: FREESKY Fit Guide for UK Riders
May 09, 2025 09:00
Choosing the right e-MTB frame size is crucial for comfort, control and safety – especially on a powerful fat-tyre model. This e-MTB frame size guide for UK riders explains how to measure electric mountain bike frame dimensions (seat tube, reach and standover height) in both centimetres and inches. We’ll also include a FREESKY E-MTB size chart (rider height vs frame size) and sample geometry data from FREESKY’s fat-tyre models (Warrior Pro M-530, Alaska Pro M-520, Ranger M-540) to help you pick the perfect fit. Finally, we highlight why the 26″×4″ fat tyres on these bikes offer superior comfort and traction on varied terrain. How to Measure an E-MTB Frame When measuring an e-MTB’s frame, focus on three key dimensions: seat tube length, reach, and standover height. These measurements help match rider height and riding style to the bike’s geometry. Seat Tube Length – This is the length of the frame’s seat tube, usually measured from the centre of the bottom bracket (where the cranks attach) up to the top of the seat tube (or the seat tube-clamp intersection). It roughly corresponds to the “frame size” of many bikes. To measure it, place the zero end of a tape measure at the centre of the bottom bracket and extend it along the seat tube to the top. Seat tube lengths are often given in inches or cm. For example, a 17″ (≈43 cm) seat tube is common on a mid-size frame. The correct seat tube size ensures your legs extend comfortably when pedalling without overextending or cramping. Reach – Reach is the horizontal distance from the bottom bracket centre to the top centre of the head tube (near the handlebar). It reflects how far you have to lean forward to reach the bars. To measure reach, measure horizontally from the centre of the bottom bracket to an imaginary vertical line through the top of the head tube. A longer reach generally suits taller riders or those who prefer a stretched-out position, while a shorter reach fits more upright riders. For example, the FREESKY Warrior Pro M-530 has a reach of about 45 cm (17.7″), while the smaller Ranger M-540 has about 40.6 cm (16″). Standover Height – This is the height of the top tube above the ground, measured at the point where you stand over the bike. To measure, stand the bike upright on level ground and measure from the ground straight up to the point on the top tube just in front of the seat tube. Standover height ensures you have a safe gap between your body (groin area) and the top tube when standing over the bike. For example, the Warrior Pro M-530 has a high standover (about 68.8 cm (27.1″)) to match its taller frame, whereas the smaller Ranger M-540 is about 45.7 cm (18″). Make sure there’s at least 2–3″ (5–8 cm) of clearance between the top tube and your body when standing astride the bike. Taking these measurements (in cm and inches) helps you compare different e-MTBs. Many manufacturers list these dimensions in their specs, but measuring your own bike or referencing a fit chart is the safest way to ensure a correct fit. Finding Your Frame Size Once you know your measurements, use the seat tube length as a general frame size indicator. Riders often base frame size on their height and leg length. For a rough guide: Rider Height (ft & in) Rider Height (cm) Suggested Seat Tube (in) Suggested Seat Tube (cm) 4′10″ – 5′2″ 148–158 13″ – 14″ 33 – 36 5′2″ – 5′6″ 158–168 15″ – 16″ 38 – 42 5′6″ – 5′10″ 168–178 17″ – 18″ 43 – 46 5′10″ – 6′1″ 178–185 19″ – 20″ 48 – 51 6′1″ – 6′4″ 185–193 21″ – 22″ 53 – 56 For example, a rider 5′4″ (162 cm) tall would typically fit a frame with roughly a 15″–16″ (38–42 cm) seat tube. Always check the manufacturer’s specific size chart if available, and consider your leg inseam and reach preferences. FREESKY E-MTB Size Reference FREESKY’s fat-tyre e-MTBs (Warrior Pro M-530, Alaska Pro M-520, Ranger M-540) share the 26″×4″ tyre platform but have slightly different geometry. Below are reference figures for each model: FREESKY Warrior Pro M-530 (dual-motor, step-over frame): Seat height 88.9–101.6 cm, reach ≈45 cm (17.7″), standover ≈68.8 cm (27.1″). FREESKY Alaska Pro M-520 (dual-battery trail bike): Seat height 80–103.4 cm, reach ≈45.7 cm (18″), standover ≈51.8 cm (20.4″). FREESKY Ranger M-540 (750 W step-thru): Seat height 86.4–99 cm, reach ≈40.6 cm (16″), standover ≈45.7 cm (18″). These figures come from FREESKY’s official geometry charts. Note the Warrior Pro M-530 is the largest frame, with a higher standover and longer reach, while the Ranger M-540 is more compact. When choosing a model, compare these numbers to your body dimensions: taller riders may prefer the Warrior or Alaska, whereas shorter riders or those who want easy mounting may like the Ranger. Frame Size Chart by Rider Height To simplify choosing a frame size, here’s a quick chart of rider height vs. suggested frame (seat tube) size. This is a general guide; individual comfort may vary. The seat tube is given in both inches and centimetres. Rider Height (cm / ft) Suggested Seat Tube (in) Suggested Seat Tube (cm) 147–158 cm (4′10″–5′2″) 13″ – 14″ 33 – 36 cm 158–168 cm (5′2″–5′6″) 15″ – 16″ 38 – 42 cm 168–178 cm (5′6″–5′10″) 17″ – 18″ 43 – 46 cm 178–185 cm (5′10″–6′1″) 19″ – 20″ 48 – 51 cm 185–193 cm (6′1″–6′4″) 21″ – 22″ 53 – 56 cm This table follows standard MTB sizing guides. For example, a 180 cm tall rider would typically choose about a 19″–20″ (48–51 cm) seat tube. If you fall between sizes, consider your riding style: a smaller frame gives a more upright, nimble feel, while a larger frame provides stability for straight-line speed. Why 26″×4″ Fat Tyres Matter for E-MTBs All FREESKY models come fitted with 26″×4″ fat tyres, and for good reason. Compared to narrow MTB tyres, fat tyres offer several riding advantages: Superior comfort and cushion: The extra width and volume allow running lower tyre pressures, so fat tyres soak up bumps and vibrations. This is like wearing “thick-soled shoes” on rough trails. Fat tyres have much greater shock-absorption than skinny tyres, reducing impact on rider and bike. You’ll notice a smoother ride on rocky or uneven paths. Outstanding grip and traction: The wide contact patch of a 4″ tyre greatly increases grip, especially on loose or slippery ground. Fat tyres “increase the contact area of the ground”, giving better traction on mud, sand, snow or gravel than a 2″ tyre. Riders can tackle soft terrain (snow-covered trails, sandy beaches or loose gravel) that would stall a normal MTB. FREESKY fat tyres let you “ride freely in snow, woodland, mud and gravel terrain” with confidence. This all-season traction opens up more trails. Enhanced stability: Beyond grip, the extra width improves bike stability. Fat tyres “provide a higher margin of safety” on rough terrain and make balance easier at low speeds. You can corner with confidence, even in wet or loose conditions, because fat tyres “stick really well” and resist slipping. Overall, 26×4 tyres transform a mountain bike into a multi-terrain cruiser, great for UK trails or even winter riding. In short, fat tyres boost both comfort and terrain capability. They cushion impacts and keep you on your wheels where narrow tyres might wash out. For UK riders wanting a versatile electric trail bike, the 26″×4″ tyre setup of FREESKY e-MTBs is a standout feature. As one cycling expert notes, fat-tyre e-bikes are increasingly popular because their “substantial fat tires” paired with powerful motors let riders traverse “snow and sand” and “explore places [they] previously struggled to reach on a narrow-tire bike”. Get Fitted and Take a Test Ride A perfect frame fit makes all the difference in e-MTB comfort and handling. Use the guidance above to measure your bike and match a seat tube size to your height. Then consult FREESKY’s product pages for the Warrior Pro, Alaska Pro and Ranger models to review the detailed specs and dealer options. By measuring properly and considering our fat-tyre advantages, you’ll be ready to enjoy a confident, comfortable ride on your new FREESKY e-MTB.
Read More

Start Your Electric Bike Without a Key: NFC Unlocking Made Easy
Apr 15, 2025 05:55
In the world of electric bikes, convenience and innovation go hand in hand. The Warrior eBike stands as a testament to this, offering riders not just a powerful and rugged ride, but also cutting-edge technology that makes your life easier. One of the standout features of the Freesky ebike is its NFC (Near Field Communication) unlocking capability, allowing you to start your bike without the hassle of a physical key. Let’s dive into how this feature works and why it’s a game-changer for eBike enthusiasts. What is NFC and How Does It Work? NFC technology allows devices to communicate wirelessly when they are close to each other, typically within a few centimeters. It’s the same technology used in contactless payment systems like Apple Pay or Google Wallet. In the case of the Warrior eBike, the NFC function is integrated into the bike's dashboard, enabling a seamless and secure way to unlock and start your bike. The Freedom of Keyless Riding Imagine this: You’re ready to hit the road, but instead of fumbling through your pockets or bag for a key, you simply tap your NFC-enabled device, like a smartphone or a card, on the bike's dashboard. In an instant, the Warrior eBike powers up, and you’re ready to ride. This keyless start feature not only saves you time but also adds an extra layer of security—only devices with the correct NFC chip can unlock the bike. Why Choose the Warrior eBike? The Warrior eBike isn't just about convenience. It's a powerful machine designed for those who seek adventure and reliability. With its robust build, high-torque motor, and long-lasting battery, the Warrior is ready to take on any challenge. Whether you’re commuting through the city or exploring off-road trails, the Warrior delivers an exceptional riding experience. The addition of NFC unlocking is the icing on the cake. It reflects the bike's commitment to blending technology with performance, ensuring that every ride is not just enjoyable but also effortless. Plus, you’ll never have to worry about losing your keys again. How to Set Up NFC Unlocking on Your eBike Getting started with the NFC unlocking feature on your eBike is straightforward: Activate NFC on Your Device: Ensure that your smartphone or NFC-enabled card is ready to use. Most modern smartphones come with built-in NFC functionality. Pair Your Device with the Bike: Follow the easy instructions provided in the Warrior eBike manual to pair your NFC device with the bike’s dashboard. This usually involves placing the device near the NFC reader and confirming the pairing. Unlock and Ride: Once paired, you can start your bike anytime by simply tapping your device on the dashboard. It’s that easy! The Freesky ebike eBike is a perfect blend of power, durability, and smart technology. The NFC unlocking feature is just one of the many reasons why this bike stands out in the crowded electric bike market. It offers riders the freedom of keyless riding, enhancing the overall experience and making every journey more enjoyable. If you’re looking for an eBike that’s not just about getting from point A to point B but also about embracing the future of riding, Freesky ebike is your go-to choice. Ready to experience the future of eBiking? Hop on a Freesky ebike and ride key-free into your next adventure!
Read More

Understanding Ebike Classes: What You Need to Know About Class 1, 2, and 3
Mar 17, 2025 06:12
Electric bikes (ebikes) are transforming how we commute, exercise, and enjoy the outdoors. If you're shopping for an ebike or just curious about them, you've likely come across terms like Class 1, Class 2, and Class 3. But what do these classifications mean, and how do they affect your ride? Let’s dive into the details. Class 1: Pedal Assist Only Class 1 ebikes are the simplest type of ebike. These bikes use a pedal-assist system (PAS), which means the motor provides assistance only when you’re pedaling. There’s no throttle to accelerate without pedaling. This type of ebike is designed to help riders tackle hills, headwinds, and long distances without wearing them out. Top speed: The motor assists you up to 20 mph (32 km/h). After that, it stops providing power, and you're on your own! Ideal for: Commuters, casual riders, and those looking for a little help on longer trips. Legal access: Class 1 ebikes are generally allowed anywhere regular bikes are permitted, including bike lanes and trails, making them one of the most versatile options. Class 2: Pedal Assist and Throttle Class 2 ebikes take things up a notch by including both pedal assist and a throttle feature. You can still pedal and receive assistance, but you also have the option to use the throttle for a motorized boost without pedaling. This can be particularly useful for starting from a stop or if you want to take a break from pedaling. Top speed: Like Class 1, the top speed is 20 mph (32 km/h). However, the throttle allows you to maintain this speed without pedaling. Ideal for: Riders who want the flexibility of pedaling or using the throttle, especially for quick bursts of speed or easier hill climbing. Legal access: Similar to Class 1, Class 2 ebikes are allowed on most bike lanes and trails, though some areas may have restrictions on throttle use. Class 3: Speed Pedelec (Pedal Assist Only, but Faster!) If you’re looking for more speed, Class 3 ebikes are where it's at. These bikes feature pedal assist like Class 1 but with a higher maximum assisted speed. There’s no throttle on these bikes, so you'll have to pedal to activate the motor. Top speed: The motor will assist you up to 28 mph (45 km/h), making them significantly faster than Class 1 or 2 ebikes. Ideal for: Commuters looking to cover more distance quickly, experienced cyclists, and those comfortable riding at higher speeds. Legal access: Class 3 ebikes are more restricted. While they’re allowed on roads and bike lanes, they’re often prohibited from shared-use paths and off-road trails due to their higher speed. Which Class Should You Choose? The choice between Class 1, 2, and 3 depends on your riding style, local regulations, and where you plan to ride: If you’re a commuter using bike lanes and urban paths, Class 1 or 3 might be your best bet. If you want versatility and the ability to take breaks from pedaling with a throttle, Class 2 offers the perfect balance. For speed enthusiasts and those tackling longer, faster rides, Class 3 ebikes provide a thrilling experience, though you’ll need to be mindful of local restrictions. Regulations to Keep in Mind Each country, state, and even city may have different laws governing ebike use. While the 20 mph limit is a common cutoff for Class 1 and 2 ebikes, Class 3 ebikes may require you to wear a helmet or restrict access to certain paths. Always check your local laws before buying or riding an ebike. Final Thoughts Understanding the differences between Class 1, 2, and 3 ebikes is essential when choosing the right bike for your needs. Whether you want an extra boost on your commute, the flexibility of a throttle, or the thrill of higher speeds, there’s an ebike class for you. Just be sure to factor in your local regulations and where you plan to ride to ensure a safe and enjoyable experience.
Read More
| Product Title |
| Price |
| Color |
| Frame Style |
| Mode |
| Power |
| Battery Capacity |
| Charging Time |
| Assist Speed |
| Range |
| Rider Height |
| Rear Derailleur |
| Front Fork |
| Motor |
| Sensor |
| Charger |
| Controller |
| Torque |
| Suspension |
| Display |
| Brakes |
| Tires |
| Seat Post |
| Bike Weight |


