


FREESKY Blogs
Stay updated with the latest news, tips, and insights on e-bikes, technology, and sustainable riding through the FREESKY blog.


You May Also Like

Cycling Package (10-Piece Kit)
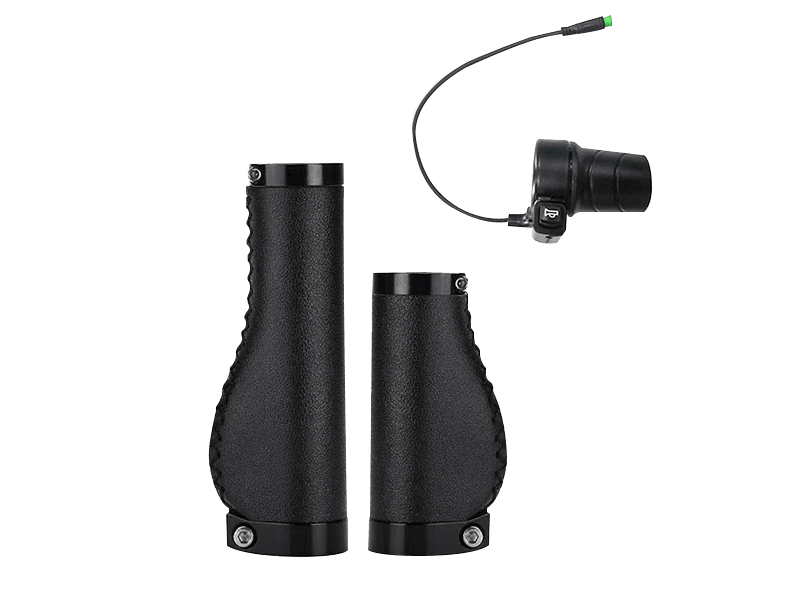
Twist Throttle with Grips
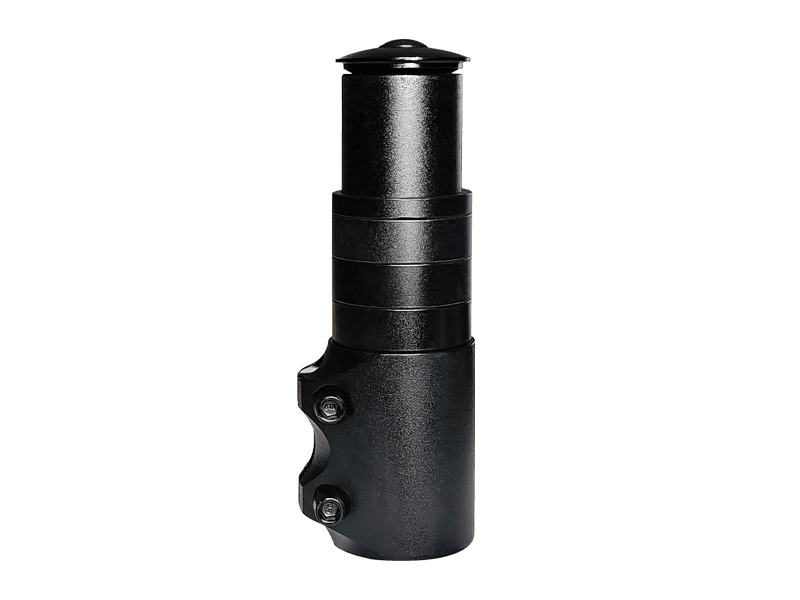
Stem Extender
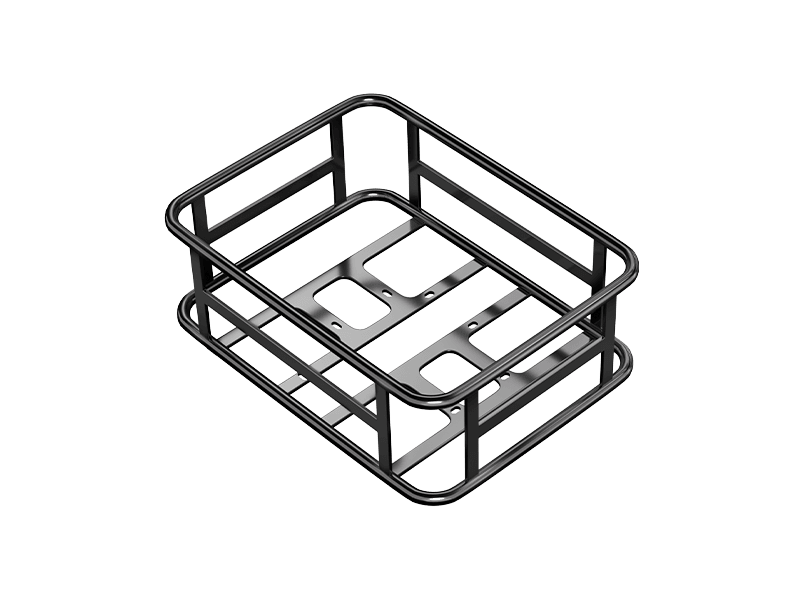
Rear Basket


There's no item in your cart.
You May Also Like
Cycling Package (10-Piece Kit)
£299.00
Twist Throttle with Grips
£59.00
Stem Extender
£35.00
Rear Basket
£89.00
You're Saving £0.00
Shipping, taxes, and discount codes calculated at checkout.All Topics


Can You Ride an E-Bike in the Rain? Tips to Protect Your Commuter Bike
Feb 03, 2026 09:00
Riding an e-bike in the rain can be daunting for many commuters. Water, wet roads, and even winter salt can raise concerns about battery safety, rust, and long-term maintenance. The good news is: modern e-bikes are designed to handle wet conditions — with the right precautions, you can ride confidently and keep your bike in top shape. Here’s a practical guide to protecting your commuter bike when riding in the rain. Are E-Bikes Safe in the Rain? Many riders worry that rain can damage electronics or motors. While caution is always wise, most quality commuter e-bikes are built for wet conditions: - Sealed electrical components prevent water damage - Weather-resistant motors and controllers are designed to withstand splashes - Waterproof wiring and connectors keep systems running reliably As one Alaska Pro rider mentioned: “It’s out in all conditions. Never had a problem in rain or snow.” So yes, riding in the rain is generally safe — but routine care and protection habits are key to long-term reliability. 1. Protect the Battery From Rain and Road Salt The battery is the most valuable part of an e-bike. Exposure to water, salt, or mud can shorten its lifespan if not managed properly. Here’s how to protect it: - Use a battery cover: Shields the battery from direct rain and salt spray. - Check seals regularly: Ensure the cover and connectors stay tight. - Store indoors when possible: Remove the battery after wet rides if you can. A little preventive care goes a long way, especially in winter or coastal environments. 2. Wipe Down Your Bike After Wet Rides Even a quick wipe can prevent corrosion and keep your bike looking new: - Use a dry cloth to remove water from the frame, battery, and display - Pay attention to bolts, chain, and cassette - Avoid letting puddles or salt linger on metal parts A 2–3 minute routine after commuting in the rain can save hours of maintenance later. 3. Lube and Grease More Frequently Rain washes away lubrication, which can lead to wear or rust. To maintain smooth performance: - Lubricate the chain more often - Apply grease to exposed metal contact points - Check moving parts regularly for signs of rust or corrosion Think of this as preventive maintenance, not extra work. 4. Store Your E-Bike Properly How you store the bike after a wet ride matters as much as riding itself: - Store indoors or under a covered area - Avoid sealing a wet bike in an airtight space - Let it dry naturally before long-term storage - Remove the battery if possible and store in a dry, temperature-stable place Proper storage keeps electrical components safe and prevents long-term corrosion. 5. Additional Rain-Riding Tips - Fenders are your friend: Reduce mud and water splashing - Check tire pressure: Wet roads require slightly lower pressure for grip - Avoid puddles when possible: They may hide debris or potholes Final Thoughts Riding your e-bike in the rain doesn’t have to be stressful. With the right precautions: ✅ The bike is built for wet conditions ✅ Battery covers and proper storage protect electronics ✅ Quick wipe-downs and regular lube prevent rust ✅ Small maintenance routines keep your commuter reliable year-round By following these simple steps, your e-bike can safely serve as your daily commuter — rain or shine.
Read More

How to Ride an Electric Bike for the First Time A Beginner’s Guide
Jan 12, 2026 09:00
Riding an electric bike for the first time is an exciting experience. While e-bikes look similar to traditional bicycles, the added motor and battery change how they behave on the road. The good news is that you don’t need special skills to get started—just a clear understanding of how the system works and a few basic riding techniques. This guide walks you through everything you need to know, from choosing the right e-bike to riding safely in traffic and handling common issues. Preparing Your E-bike Before the First Ride A proper setup ensures comfort, control, and safety. Before you ride, take time to understand your e-bike type, adjust the fit, and check that all components are working correctly. Choosing the Right Type of E-bike E-bikes are designed for different riding scenarios: - Commuter e-bikes are ideal for daily city travel. They often include racks, fenders, and comfortable riding positions. - Electric mountain bikes (e-MTBs) feature reinforced frames and suspension systems for off-road trails and uneven terrain. - Folding e-bikes are compact and practical for riders with limited storage space or frequent public transport use. Selecting the correct size is just as important as choosing the right category. When standing over the frame, you should be able to touch the ground comfortably. While seated, your leg should extend almost fully at the lowest pedal position, with a slight bend at the knee. A short test ride helps confirm whether adjustments are needed. Understanding the Key Components of an E-bike Most electric bikes rely on four core components working together: - Motor: Positioned either in the wheel hub or near the pedals (mid-drive), providing assistance as you ride. - Battery: Mounted on the frame or rear rack, supplying power to the motor. - Display: Shows speed, battery status, and assistance level. - Control unit: Handlebar-mounted buttons for adjusting assist modes and, on some models, activating a throttle. Knowing where these parts are and how they interact will make your first ride more predictable and controlled. Essential Safety Gear for E-bike Riders Safety should always come first, especially when riding a faster, heavier bike. Recommended gear includes: - Helmet: Properly fitted, sitting level on your head and secure under the chin. - Gloves: Improve grip and protect your hands. - High-visibility clothing: Bright or reflective apparel helps others see you in traffic or low-light conditions. In addition, familiarize yourself with local e-bike regulations. Speed limits, access to bike paths, and equipment requirements vary by region. Before every ride, perform a quick inspection: test the brakes, confirm the battery is locked in place, and inflate the tires to the recommended pressure listed on the sidewall. Starting and Stopping an Electric Bike Safely Mastering basic handling is essential for building confidence. Mounting and Dismounting Because e-bikes weigh more than traditional bicycles, stability is key: 1.Hold both brake levers firmly. 2.Stand beside the bike and keep it upright. 3.Swing one leg over the frame and sit down. 4.Place your feet on the pedals only when ready to move. When stopping or dismounting, reverse the process and keep the brakes engaged to prevent unexpected movement. Using Power Assist and Throttle Control Once powered on, start with the lowest assistance level. This allows you to get used to how the motor responds to pedaling. Typical assist levels work as follows: - Low assist: Best for flat roads and conserving battery. - Medium assist: Suitable for mild hills and steady cruising. - High assist: Designed for steep climbs, strong headwinds, or faster acceleration. If your e-bike includes a throttle, use it cautiously. Throttles deliver instant power and can be helpful in specific situations, but pedal assist is generally more efficient and easier to control, especially in crowded areas. Improving Your Riding Skills on an E-bike Once you’re comfortable with the basics, refining your technique will improve safety and performance. Turning and Cornering Approach corners with reduced speed and lower assist levels. Keep your inside pedal raised and look through the turn toward your exit path. Smooth, controlled movements help maintain balance and traction. Riding on Different Surfaces - Loose gravel: Slightly lift off the saddle and relax your arms to absorb vibrations. - Wet pavement: Brake earlier, reduce assist, and avoid sharp turns. - Uphill climbs: Shift to a lower gear before the incline begins. - Downhill sections: Use light, intermittent braking rather than continuous pressure to maintain control. Extending Battery Range Efficient riding habits can significantly increase your range: - Use higher assist only when necessary. - Take advantage of downhill sections by reducing or turning off assistance. - Anticipate stops to avoid frequent acceleration. - Consider wind direction when planning longer routes. Smart energy management not only extends battery life but also creates a smoother riding experience. Traffic Rules and Shared Path Etiquette In most regions, e-bike riders follow the same traffic laws as traditional cyclists. Obey traffic signals, use bike lanes where available, and ride predictably. When sharing paths with pedestrians: - Yield to walkers. - Signal your presence verbally or with a bell. - Pass slowly and only when there is enough space. Always remain aware that e-bikes are quieter and faster than regular bikes, which means others may not notice you approaching. Solving Common E-bike Issues Battery Runs Out Mid-Ride If the battery is depleted, the bike still functions normally—just without assistance. Shift to an easier gear, pace yourself, and consider planning routes with backup options such as bike shops or public transport. Unusual Noises Routine maintenance can prevent most problems: - Keep the chain clean and lubricated. - Check tire pressure regularly. - Clean brake rotors if you hear squealing. - Wipe battery contacts occasionally to ensure good connection. Performance Feels Off Seek professional service if you notice braking issues, inconsistent motor output, or unusual vibrations. Electrical and mechanical systems are best handled by experienced technicians. Enjoy Your E-bike Experience Electric bikes make cycling more accessible, efficient, and enjoyable. With a basic understanding of the components, proper safety habits, and steady practice, most riders gain confidence quickly. Whether you’re commuting, exploring trails, or riding for leisure, an e-bike opens up new possibilities. If you’re still unsure, visiting a local bike shop or renting an e-bike for a short ride is an excellent way to experience the benefits firsthand. Once you start riding, it often becomes a habit you look forward to every day 🚲✨
Read More

Motor Core Maintenance
Jan 07, 2026 09:30
1. Why Nylon Gears Are Used for the Clutch Instead of Metal a. Vibration and Noise Reduction Motor vibration and noise largely come from the rigid impact during gear meshing. Metal gears are hard and low in elasticity, so they cannot absorb impact effectively, often producing high-frequency vibrations and noise. Nylon gears, on the other hand: - Have high toughness and elastic deformation capability, reducing vibration transmission. - Feature a lower surface friction coefficient, further decreasing operating noise. b. Lightweight Design Nylon gears are lighter than metal gears, which provides several benefits: - Reduces motor starting current by ~15%. - Lowers energy consumption during continuous operation by 8–10%. - Decreases radial load on motor bearings, extending bearing service life and improving overall motor efficiency. c. Corrosion Resistance and Chemical Stability Motor cores may encounter moisture, oil, or mildly acidic/alkaline environments. Metal gears can corrode, leading to transmission failure. Nylon gears offer: - Excellent chemical stability. - Resistance to water, oils, salt spray, and most organic solvents. - No rust formation unless exposed to strong oxidizers or high-temperature strong acids/alkalis. d. Electrical Insulation Motor cores contain energized components like coils and brushes. Metal gears touching these parts can cause electrical leakage, posing a safety risk. Nylon is an electrical insulator, preventing current conduction and reducing leakage risk at the design level. 2. When to Disassemble the Motor Core for Maintenance - Increased Noise: If the motor becomes louder than usual, inspect the core for insufficient lubrication grease. - Routine Inspection: Replenish grease every 600–800 miles of riding. - Rainy Season Maintenance: After long-term riding in wet conditions, inspect metal components for rust. Lightly polish affected areas with sandpaper and reapply lubrication grease if needed. 3. Lubrication Grease Selection Criteria - Operating Temperature Range: –20°C to 45°C - Below –20°C: Grease thickens: solidifies around –45°C. - Above 45°C: Grease thins: fully liquefies around 80°C. Selection Guidelines: Choose grease that is: - High-temperature resistant - Low-temperature resistant - Waterproof
Read More

FREESKY Full Suspension Fat Tire Electric Mountain Bikes Buying Guide
Dec 29, 2025 06:28
Are you considering a full suspension fat tire electric mountain bike for commuting, off-road adventures, or leisure rides? Choosing the right electric bike can be challenging given the many options available. This FREESKY Buying Guide will help you understand essential factors to consider and guide you to the perfect model for your needs. How to Choose a Full Suspension Fat Tire E-Bike Understanding your requirements is crucial before making a purchase. Here are the key steps to guide your selection: Determine Your Purpose Are you looking for an electric bike for commuting, mountain biking, or leisurely rides? Your intended use will significantly influence your choice: -Commuting: Prioritize comfort, range, and ease of handling in urban environments. -Mountain Biking: Look for robust frames, quality full suspension, and durable fat tires -suited for rugged terrain. -Leisure and Recreation: Focus on ergonomic design, adjustable seating, and comfort-oriented features. Set Your Budget Establish a budget to narrow down your options: -Entry-level: Basic models for light commuting or recreational use. -Mid-range: Better build quality and features, typically £1,000 – £3,000. -High-end: Premium e-bikes with advanced motors, batteries, and components, £3,000+. Research Brands Consider reputation, product range, and customer support. FREESKY is renowned for quality, durability, and innovation. Thorough research ensures you invest in a reliable bike backed by excellent service. FREESKY Electric Bike Series Alaska Pro M-520 Price: Now £1,599.00, Was £2,299.00 Dual battery system with 48V 41Ah capacity, full suspension, and 26" fat tires. Achieve up to 160 miles per charge. Perfect for off-road adventures and long-range commuting. Warrior Pro M-530 Price: Now £1,599.00, Was £2,299.00 Dual motor, AWD, full suspension fat tire e-bike. Top speed 40+ MPH, equipped with dual hydraulic disc brakes, large 1440Wh Samsung battery, and full-color display with NFC unlock system. Designed for serious off-road enthusiasts. Wild Cat Pro A-340 Price: £1,299.00 High-performance full suspension fat tire e-bike with 25Ah battery, 5 riding modes, and 26" fat tires. Perfect for off-road trails, commuting, and leisure riding. Why Choose FREESKY? Advanced Design and Technologies FREESKY electric bikes integrate cutting-edge features for maximum performance, safety, and riding comfort. From full suspension systems to high-capacity batteries and HD displays, each model is built to deliver reliable and enjoyable rides. Value for Money FREESKY e-bikes offer premium features at competitive prices, ranging from £1,299 to £2,199 for most full suspension fat tire models. High-quality motors, batteries, and components ensure excellent performance without overspending. Professional Customer Support FREESKY provides: -24-month warranty on motor, battery, and controller (12 months on other parts). -End-to-end customer support for assembly, maintenance, and technical assistance. -Pre-assembled delivery (around 85%) for quick and easy setup. Key Features to Consider When Choosing a Fat Tire Full Suspension E-Bike -Battery Life: Ranges from 25Ah to 60Ah depending on distance needs. -Suspension System: Full suspension enhances comfort and control on rough terrain. -Fat Tires: Provide traction, stability, and off-road capability. -Riding Modes: Electric, Pedal-Assist, Cruise, Manual, Walk, or Dual Motor for advanced models. -Safety Features: Hydraulic disc brakes, integrated lights, and smart displays improve riding confidence. Conclusion Choosing the right full suspension fat tire electric mountain bike can elevate your riding experience, whether for commuting, off-road adventures, or leisure. By understanding your needs, evaluating motor and battery specs, and considering key safety and comfort features, you can confidently select the perfect FREESKY e-bike for your lifestyle. Explore the FREESKY range today to find models that deliver power, durability, and style for every rider.
Read More

Ultimate Guide: How to Clean and Maintain Your Ebike for Peak Performance
Nov 30, 2025 11:57
Keeping your electric bike clean isn’t just about appearance—it’s essential for safety, performance, and longevity. Dirt, dust, and mud can accumulate on your bike during rides, especially on city streets, gravel paths, or off-road trails. If left unattended, this buildup can affect the drivetrain, brakes, and electronics, reducing efficiency and causing wear over time. Step 1: Pre-Cleaning Preparation Power Down and Remove the Battery - Always turn off your e-bike before cleaning. - Remove the battery if possible and store it in a dry area. - Ensure battery contacts and compartment are protected from water. Protect Sensitive Electronics - Remove or cover detachable displays, sensors, and accessories. - If components can’t be removed, wrap them in a waterproof cloth or bag. Choose the Right Cleaning Spot - Pick a shaded, ventilated area to prevent soap streaks or water spots. - Make sure there’s enough room to move around your bike and access water. Gather Cleaning Supplies - Soft brushes and sponges for delicate surfaces. - Two buckets: one for soapy water, one for rinsing. - Mild soap or bike-specific cleaner. - Hose with gentle spray or watering can (avoid high-pressure water near electronics). - Microfiber cloths for drying. - Chain lubricant for post-cleaning maintenance. ⚠️ Avoid strong chemicals or pressure washers—they can damage the bike’s motor, battery, or display. Step 2: Cleaning Process Rinse Off Loose Dirt - Use a damp sponge or cloth to wipe away surface dirt. - Avoid spraying directly on electronic components or bearings. Apply Soap and Scrub - Mix mild soap in warm water. - Start at the top of the bike and scrub downward. - Use separate brushes for tires and rims if heavily soiled. Clean the Drivetrain - Pay attention to the chain, gears, and derailleur. - Use a small brush and rotate pedals backward. - Minimize water exposure to prevent rust. Wipe Electronics Carefully - Lightly dampen a cloth and wipe battery casing, motor, and display. - Do not soak or allow water to drip into openings. Rinse Off Soap - Use a clean cloth or sponge to remove soap residue. - Work from top to bottom, being careful around sensitive areas. Step 3: Drying Your Ebike - Wipe the bike with microfiber cloths, focusing on frame joints and crevices. - Let the bike air-dry in a ventilated area away from direct sunlight. - Tilt or shake the bike gently to remove trapped water. - Finish with a dry cloth to catch remaining moisture. Step 4: Post-Cleaning Maintenance - Reattach the battery and electronics once fully dry. - Apply chain lubricant sparingly, rotating pedals backward. - Wipe off any excess to avoid attracting dirt. - Check tire pressure and inflate to the recommended PSI. - Test brakes, shifting, and motor assist before riding. Additional Ebike Care Tips - Perform regular inspections of brakes, tires, drivetrain, and electronics. - Store your bike in a dry, temperature-controlled environment. - Avoid deep battery discharges and follow manufacturer charging guidelines. - Consider professional servicing annually, particularly for motors and battery systems. Frequently Asked Questions How often should I clean my e-bike? - After muddy or dusty rides, or at least every few weeks for general upkeep. What if water gets into electronics? - Disconnect the battery, dry components, and allow the bike to air-dry completely. Can household cleaners be used? - Mild soap or bike-specific cleaners are safest. Harsh chemicals may damage paint or electronics. How can I protect the bike’s finish? - Applying bike polish or wax helps repel dirt and water and makes future cleaning easier. Best way to lubricate the chain? - Apply bike-specific lubricant to each link while rotating pedals backward, then wipe off excess. By following these steps, you can keep any e-bike performing at its best, extend component life, and reduce the risk of mechanical issues. Regular cleaning and maintenance make every ride smoother, safer, and more enjoyable.
Read More

Difference Between Step-Through and Step-Over Electric Bikes
Oct 28, 2025 02:15
Difference Between Step-Through and Step-Over Electric Bikes When shopping for an electric bike, one of the first choices you’ll encounter is the frame design: step-through vs. step-over. While both types provide excellent riding experiences, their designs serve different needs and preferences. Understanding the difference between these two e-bike styles will help you choose the one that fits your lifestyle best. What Is a Step-Through Electric Bike? 🚲✨ A step-through electric bike features a low or absent top tube, making it easy to “step through” the frame to mount the bike. Key features: Low standover height Upright, relaxed riding position Easy to mount and dismount Best for: Riders who value comfort and convenience Older adults or people with limited mobility Urban commuting with frequent stops Pros: Easy to get on/off—even in work clothes or dresses Comfortable posture for casual rides Great for city commuting Cons: Slightly heavier frames May feel less rigid for aggressive riders What Is a Step-Over Electric Bike? ⚡🚴 A step-over electric bike, also called a diamond frame e-bike, has a traditional high top tube. This design is strong, stable, and common in mountain and road bikes. Key features: Higher standover height Sportier riding posture Stronger frame design Best for: Riders who prefer performance and speed Off-road, mountain, or long-distance riding Those who are comfortable swinging a leg over the frame Pros: Strong and durable frame More responsive handling Better for rough terrain and higher speeds Cons: Harder to mount/dismount, especially for shorter riders Less convenient for stop-and-go city rides Step-Through vs. Step-Over: Which One Should You Choose? 🤔 When deciding between a step-through e-bike and a step-over e-bike, consider your: Comfort needs → Choose a step-through for easy access and upright posture. Riding style → Choose a step-over if you value performance, speed, or off-road ability. Lifestyle → Commuters and casual riders often prefer step-throughs, while sporty or adventure riders lean toward step-overs. 👉 In short: Step-through = comfort & convenience. Step-over = performance & durability. Final Thoughts 🌟 Both step-through and step-over electric bikes have unique advantages. The right choice depends on your comfort preferences, riding environment, and style. If you’re looking for ease of use and daily commuting convenience, go for a step-through e-bike. If you want strength, speed, and versatility for challenging rides, the step-over e-bike is your match. Whichever you choose, proper maintenance and regular care will keep your e-bike performing at its best.
Read More

How to Maintain Your Ebike Suspension Fork for Peak Performance
Aug 08, 2025 09:00
The suspension system on an e-bike absorbs bumps and vibrations from the road, ensuring a smoother and more controlled ride. Different types of shock absorbers provide varying levels of cushioning, which directly affect your riding experience. Proper maintenance of the damping system is essential for comfort, performance, and safety. This guide outlines how to maintain your e-bike’s front suspension fork for optimal performance. What Is an Ebike Suspension Front Fork? An e-bike suspension fork improves ride comfort by absorbing shocks and vibrations from uneven terrain. Suspension forks come in several types, including spring, pneumatic (air), and hydraulic, each offering different cushioning characteristics. Besides shock absorption, they enhance stability and control, making it easier to handle rough roads or off-road trails. Key Components of an E-bike Suspension Fork Steerer Tube: Connects the fork to the bike frame. Stanchions: Two vertical tubes that slide in and out of the fork’s sliders, containing internal components like springs, air chambers, or oil. Sliders: Allow stanchions to move and connect to the front wheel while enabling smooth suspension travel. Common Issues with E-bike Suspension Forks Over time, suspension forks may develop issues that require attention for a safe and comfortable ride. Common problems include: Squeaking or Creaking: Indicates friction within moving parts; lubrication is needed. Leaks: Worn seals in pneumatic or hydraulic forks can cause fluid or air leaks and require replacement. Bottoming Out: Forks have limited travel; hitting the limit indicates improper adjustment. Low Air Pressure (for air forks): Reduced air pressure diminishes shock absorption and steering control. Damaged Fork Surface: Scratches or wear on stanchions can compromise seals and lead to leaks. Unusual Noises or Movements: Could indicate internal issues requiring inspection. How to Maintain Your Ebike Suspension Fork Regular maintenance ensures smooth operation and prolongs fork life. Follow these steps: 1. Keep It Clean Wipe stanchions with a soft cloth before and after each ride. For thorough cleaning, rinse with water to remove dirt and grime; avoid pressure washers. Pay attention to crevices to prevent debris buildup. Dry around seals and stanchions after cleaning to prevent water damage. 2. Lubricate Use suspension-specific oil for the upper seals. Apply oil and let it sit for ~20 minutes to ensure proper lubrication. Regular lubrication reduces friction and enhances smooth travel. 3. Check Settings Regularly monitor air pressure or oil level, depending on fork type. Adjust damping according to terrain and riding style for optimal performance. 4. Inspect for Damage Check for deep scratches, dents, or impacts on the fork assembly. Severe damage may require professional repair or replacement to prevent leaks and maintain safety. 5. Maintain Proper Tyre Pressure Correct tyre pressure complements the fork’s shock absorption. Helps achieve consistent cushioning and control. Fork Maintenance Intervals Frequent riders: Inspect forks weekly. Occasional riders: Check every two weeks or after particularly rough or dusty rides. Always clean and inspect forks after riding in dust, mud, or rain. Conclusion Proper maintenance of your e-bike suspension fork enhances comfort, control, and safety. Regular cleaning, lubrication, and inspection can prevent common issues and extend the life of your fork. For any visible damage or seal leaks, seek professional repair promptly to ensure safe riding. By prioritizing maintenance, riders can fully enjoy the smooth and controlled experience an e-bike provides.
Read More

5 Quick Ways to Keep Your Electric Bike Frame Tight and Secure
Aug 01, 2025 09:00
It usually starts with a faint creak. Then perhaps a wobble as you ride over a pothole or uneven paving. You’re not imagining it—your electric bike frame could genuinely be working itself loose. The good news is that most of the time, it’s not a major repair. With a few quick checks, you can tighten things up yourself and get back that solid, confident ride. Let’s look at the warning signs and the five simple fixes you can do at home. How to Spot a Loose Electric Bike Frame Creaking noises: Especially when accelerating, climbing or cornering—these often come from joints or bolts rubbing. Unstable ride feel: A soft or shifting sensation when riding over bumps or rough roads. Loose hinges or connectors: Play in folding joints or frame connections, common on folding e-bikes. Wheel misalignment: When you lift the bike, if the front and rear wheels don’t line up straight, the frame could be slightly twisted or deformed. Five Quick Frame-Tightening Checks 1. Check the Headset and Stem If your handlebars feel twitchy or you hear clicking during turns, the headset or stem may be loose. What to do: Hold the front wheel between your knees. Try twisting the handlebars—if they move separately from the wheel, tighten the stem clamp bolts with an Allen key. Don’t overtighten; the aim is snug and smooth. 2. Secure the Seat Post Clamp A slipping seat post isn’t just annoying—it can cause flex at the back of the frame. What to do: Loosen the clamp, reset your saddle height, then retighten firmly. If available, use a torque wrench for accuracy. A dab of carbon paste (for carbon posts) or grease (for alloy) can help prevent slipping. 3. Inspect the Crankset and Bottom Bracket Creaking while pedalling often comes from movement in the crank arms or bottom bracket. What to do: Wiggle each crank arm sideways. If there’s play, tighten the crank bolts with the correct Allen key. If the bottom bracket itself is loose, you may need a bike shop to re-torque or replace it. 4. Examine Folding Joints (for Folding E-Bikes) On folding bikes, the hinges and latches are critical. Even slight looseness can lead to wobble. What to do: Fully unfold and lock the bike. Check for any play in the hinges and tighten latch bolts. Lubricate moving parts where needed.⚠️ If the play persists, contact your brand’s service centre—riding with loose folding joints is unsafe. 5. Check Rear Triangle and Axle Stability The rear wheel area (seatstays, chainstays, dropouts) carries much of the load. What to do: Make sure axle nuts or quick-release levers are tight. Inspect welds for cracks or stress marks. Confirm the derailleur hanger and brake mounts are firmly secured. Why You Shouldn’t Ignore Frame Looseness A wobbly frame isn’t just irritating. Left unchecked, it can cause: Metal fatigue and cracks. Premature wear of components. In extreme cases, sudden failure and loss of control. Your frame is the backbone of your e-bike—keeping it solid is as important as charging your battery or checking tyre pressure. Preventing Frame Looseness Do a monthly manual check: Test the headset, seat post and joints by hand. After wet rides: Moisture can encourage corrosion—bolts may loosen quicker. Use the right tools: A small hex key set and torque wrench are great investments. Regular checks save bigger repairs later. Built with Stability in Mind: Freesky’s Frame Advantage Freesky frames are designed with long-term reliability at their core. Whether it’s the dual-motor Warrior Pro, the extended-range Alaska Pro, or the versatile Nova, each model is built with reinforced frame structures to resist flex and reduce vibration—so your bike feels stable, even after years of riding. Final Thoughts A solid ride starts with a solid frame. If you notice creaks, wobble or misalignment, don’t ignore it. Run these five quick checks and keep your ride tight, responsive and safe. Ride strong. Ride safe. Ride Freesky. FAQ: Electric Bike Frame Looseness 1. Do all creaks mean a loose frame?Not always—noises can also come from the saddle, pedals or brakes. But if it’s near the headset, bottom bracket or folding joints, check the frame first. 2. Is it safe to ride with a loose frame?Not recommended. Even a short ride can worsen wear or risk sudden failure. 3. Are folding e-bikes more prone to looseness?Yes. Extra hinges and latches mean more stress points. Check them more often if you fold daily. 4. How often should I check my frame?At least once a month, or every two weeks if you ride heavily or on rough roads. 5. How do I know if bolts are tight enough?Snug, not forced. A torque wrench is the safest way to get it right.
Read More

How Do Electric Bikes Perform on Hills? Understanding the Technology Behind the Climb
Jul 25, 2025 09:00
Have you ever struggled up a steep hill on your bike, battling fatigue before reaching the top? Whether you're riding through the Cotswolds, climbing the streets of Sheffield, or navigating off-road inclines, hills can be one of the toughest parts of cycling in the UK. Electric bikes (e-bikes) offer a game-changing solution—particularly models designed with hill performance in mind. By combining motor assistance with rider input, e-bikes allow you to climb more comfortably, more efficiently, and with greater confidence. In this article, we’ll explore how electric bikes handle hill climbing, which Freesky models are best suited for steep or extended inclines, and why Warrior Pro and Alaska Pro are standouts when it comes to serious climbing power. Do Electric Bikes Work Well on Hills? Absolutely. E-bikes excel on hills by delivering additional torque and support when you need it most. This makes them ideal for riders living in hilly regions, those commuting across elevation, or anyone who wants to reduce strain while climbing. In particular, e-bikes equipped with high-torque motors and intelligent control systems can tackle challenging gradients with ease—even when carrying extra load. Top Performers: Warrior Pro & Alaska Pro At Freesky UK, our e-bikes are built to meet the real demands of British terrain. Two of our most capable hill-climbing models are: 🔧 Warrior Pro: Dual-Motor Climbing Strength Dual hub motors (front and rear), working together to deliver exceptional torque Full suspension frame, ensuring traction and control over rocky or uneven hills 48V 30Ah Samsung lithium battery, delivering sustained power on climbs Up to 200Nm torque (combined) – ideal for steep inclines and trail environments Warrior Pro is the ultimate choice for riders tackling aggressive terrain, heavy loads, or who want maximum propulsion up technical climbs. 🔋 Alaska Pro: Endurance for Long Hills Dual battery system: total capacity 48V 41Ah Extended range, ideal for countryside exploration, multi-day hill routes, and long climbs without recharging Robust frame and full suspension for comfort on variable terrain Delivers consistent hill performance over time, even on routes with cumulative elevation Alaska Pro is the right choice for riders who value distance, efficiency, and reliable climbing over sustained journeys. How the Technology Helps You Climb Torque & Motor Response Climbing hills demands strong, steady torque. On the Warrior Pro, both motors work in harmony to provide this force even under pressure. This translates to: Easier hill starts, even with weight Stable climbing on uneven surfaces Less rider fatigue on long or steep hills Battery Capacity & Power Management Alaska Pro’s dual-battery system is designed for longevity. By spreading load across two battery units, the bike: Reduces energy drain on climbs Maintains stable power output over time Offers extended support for long-distance or multi-hill routes Controller Precision Both Warrior Pro and Alaska Pro are equipped with intelligent controllers that adjust assistance based on gradient and rider input. This ensures: Smooth power transitions Efficient energy usage Confidence and safety, even when switching from flat to incline Support Models: Rocky Pro & Nova While Warrior Pro and Alaska Pro are the top hill performers, Freesky also offers models suited to moderate inclines and urban hill commutes: Rocky Pro: Everyday Utility with Cargo Capability Equipped with a speed sensor-based pedal assist system, providing steady support Features a 48V 25Ah Samsung lithium battery, supporting long city rides or delivery routes Built with a sturdy frame, compatible with cargo racks and child seats Ideal for moderate hills, shopping trips, and family riding Though not designed for extreme inclines, Rocky Pro is a practical cargo-capable e-bike that handles daily urban gradients well. Nova: Smooth Pedalling with Torque Sensing With a torque sensor, providing natural and responsive pedal feel 48V 30Ah Samsung battery, with excellent range for mixed elevation routes Great for riders who want controlled, smooth assistance on moderate hills A smart choice for those focused on comfort and cadence across variable terrain How to Maximise Your Hill-Climbing Efficiency Regardless of the e-bike model, you can improve your hill-riding performance by following a few best practices: Shift early: move into a low gear before the hill begins Use pedal assist appropriately: higher levels for steeper sections Keep your cadence steady: let the motor support your rhythm Distribute weight: especially when riding with cargo, keep balance over both wheels Lean forward: improves front traction on climbs Which Freesky Model Should You Choose for UK Hills? Model Sensor Type Battery Setup Best For Warrior Pro Speed sensor 48V 30Ah Samsung (dual motor) Steep climbs, off-road trails, high torque demand Alaska Pro Speed sensor Dual 48V 41Ah Extended hill routes, countryside touring Rocky Pro Speed sensor 48V 25Ah Samsung Cargo use, moderate hills, city gradients Nova Torque sensor 48V 30Ah Samsung Natural pedalling, moderate climbs, smooth commuting Conclusion: Conquering Hills with Freesky E-Bikes Whether you're climbing the winding roads of North Wales or facing steep London boroughs, a Freesky e-bike gives you the tools to ride with confidence. Choose Warrior Pro for unmatched climbing strength and multi-surface control Opt for Alaska Pro if you need sustained hill support and exceptional range Select Rocky Pro for daily use with cargo on rolling hills Go with Nova for smooth, torque-sensing comfort across variable terrain Freesky UK builds every model with purpose. So when it comes to hills, we’ve got you covered—no matter how high the climb.
Read More
| Product Title |
| Price |
| Color |
| Frame Style |
| Mode |
| Power |
| Battery Capacity |
| Charging Time |
| Assist Speed |
| Range |
| Rider Height |
| Rear Derailleur |
| Front Fork |
| Motor |
| Sensor |
| Charger |
| Controller |
| Torque |
| Suspension |
| Display |
| Brakes |
| Tires |
| Seat Post |
| Bike Weight |


